Moving domains is something you hopefully won’t ever have to do. It’s an easy way to mess with your SEO and a great way to fudge up your site. If you do however need to move domains and you want this to be permanent, then an HTTP 301 Moved Permanently redirect is what you’ll want. This is something I’ve had to do recently moving the inboxes.app website to inboxesapp.com, and while it’s not as straight forward as with nginx, it’s still not all that bad.
You’ll first want to consider what should stay and what can move. In the case of inboxes app, the Chrome extension API is located on the old domain, and it’s not really an issue if it stays there. User emails make use of the .app domain, so that must stay, and besides it’s a great domain for short emails too! Apart from that, the website is good to move, and using CloudFlare to 301 redirect makes perfect sense for me as I’m using a dedicated wordpress host to run this website, meaning I’ve no access to .htaccess nor server configs.
Setting up the Cloudflare 301 redirect
You’ll need to be signed in to CloudFlare, but you can access the workers page via their Workers website. You’ll then need to “Create a service”. Give it an obvious name like redirect and paste in the following code, replacing the base variable with your new website you’d like to 301 redirect to.
const base = "https://inboxesapp.com"
async function handleRequest(request) {
const url = new URL(request.url)
const { pathname, search } = url
const dest = base + pathname + search
return Response.redirect(dest, 301)
}
addEventListener("fetch", async event => {
event.respondWith(handleRequest(event.request))
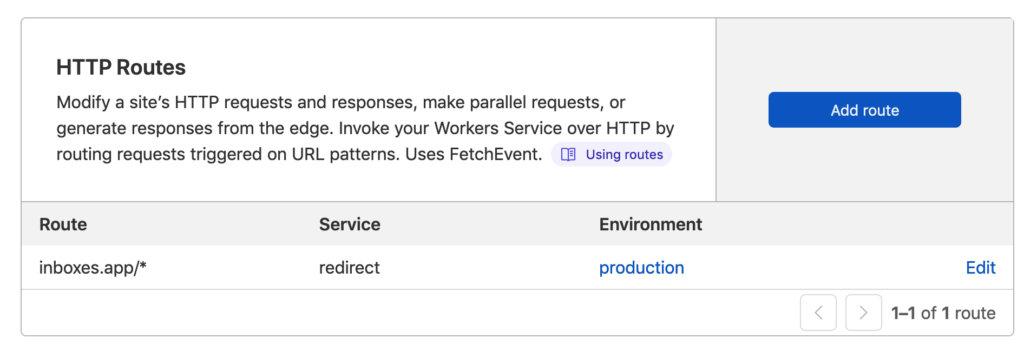
})To make use of the worker, you’ll then need to hop in to your old address in the main CF dashboard, then select workers and then set up a new HTTP Route. For my case, I used the following route: inboxes.app/* and selected redirect as the service and environment as production.
Once deployed, Cloudflare will send all inbound traffic to your new redirect worker, which will in turn tell the browser to 301 redirect to your new address. Don’t forget to also set up your SSL within the dashboard, as redirecting from an https to an http domain won’t help your SEO very much.
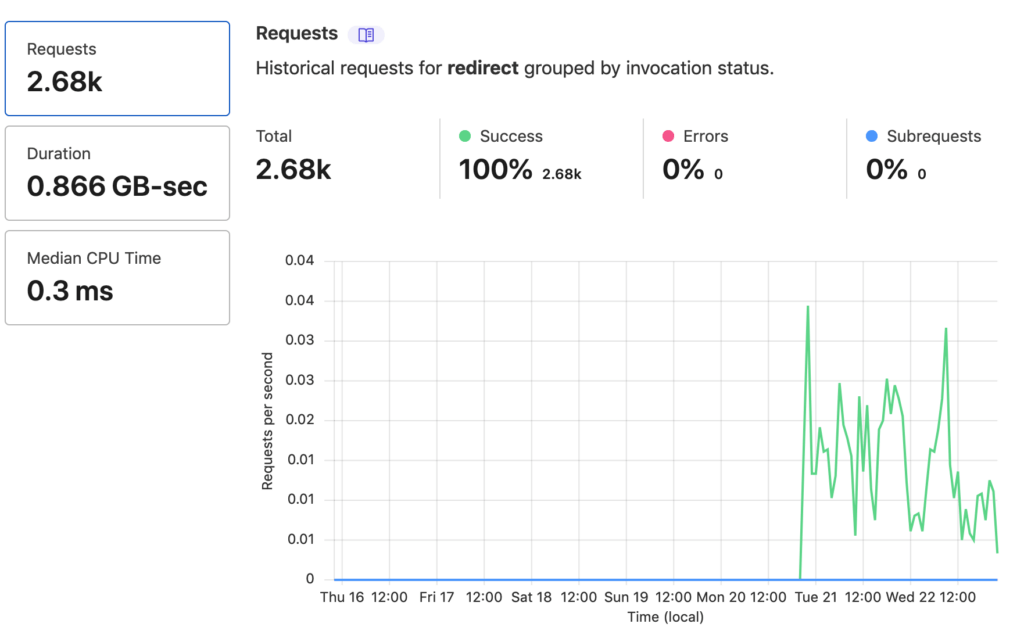
The final result is that you’ll be able to jump into the dashboard and see all your traffic being successfuly redirected to your new domain. With 100k free invocations a day, you shouldn’t have to worry about hitting any limits, and even if you do it’s only $0.50 per million invocations. What I expect to see in the coming months is this graph trending downwards as search engines start to prioritise the new inboxesapp.com domain.
How does Nginx compare?
If you can avoid the above, I’d recommend it. There’ll be fewer things to go wrong, and the setup is far simpler. Within your nginx sites-enabled folder, you’ll have your old domain and your new domain configs. In the old domain config you’d have something like the following:
server {
    listen 443 ssl;
    server_name inboxes.app
    return 301 $scheme://inboxesapp.com$request_uri;
    ... ssl certbot configs
}
And that’s pretty much it. A quick restart of nginx and you’ll be redirecting all your old traffic to your new domain.
Posted on: December 22, 2021 by Inboxes